Friday, December 4, 2009

Friday, October 16, 2009


Friday, October 9, 2009

Outline Of The Institutional Context Of Our Band
Name Of Record Label:
Wichita Recordings, Atlantic Records
Type Of Record Label:
Wichita Recordings is an independent Record Label started in London, England working with artist targeting the English Indie Rock market. Atlantic Records started in the 1940s works with American Main stream rock and English Indie, Hip hop, Rap.
Other Acts Signed To The Label:
Wichita Recordings: Bloc Party, The Cribs, Clap Your Hands Say Yeah, Bright Eyes, My Morning Jacket, Yeah Yeah Yeahs, Her Space Holiday, Los Campesinos.
Atlantic Records: Kid Rock, The Notorious B.I.G., Craig David, The Streets, Wiley Gnarls Barkley.
Examples of videos/artwork advertising used by the label for their other acts:


Wichita Recordings, Atlantic Records
Type Of Record Label:
Wichita Recordings is an independent Record Label started in London, England working with artist targeting the English Indie Rock market. Atlantic Records started in the 1940s works with American Main stream rock and English Indie, Hip hop, Rap.
Other Acts Signed To The Label:
Wichita Recordings: Bloc Party, The Cribs, Clap Your Hands Say Yeah, Bright Eyes, My Morning Jacket, Yeah Yeah Yeahs, Her Space Holiday, Los Campesinos.
Atlantic Records: Kid Rock, The Notorious B.I.G., Craig David, The Streets, Wiley Gnarls Barkley.
Examples of videos/artwork advertising used by the label for their other acts:


http://www.youtube.com/watch?v=kiLglQ_-NbQ


Demographic And Psychographic Profiles Of Our Target Audience
-Festival/gig attendees
-Readers of NME
-Listeners of RADIO 1, in particular Zane Lowe and XFM.
-Fashionable people
-Arty people
-Age 16+
-People that care about their subjects
-Attendees of college and university
-Portobello, Oxford Street, Brighton north Lane shoppers
-EXPERIENCERS
-STRIVERS
-TRENDIES
-INOVATERS
-REBELS
-COWBOYS
We would have a range between; B (Middle management/ administration/ professional), C1 (Supervisory /clerical/ junior management), C2 (Skilled manual) and D (Semi and unskilled manual).
-Readers of NME
-Listeners of RADIO 1, in particular Zane Lowe and XFM.
-Fashionable people
-Arty people
-Age 16+
-People that care about their subjects
-Attendees of college and university
-Portobello, Oxford Street, Brighton north Lane shoppers
-EXPERIENCERS
-STRIVERS
-TRENDIES
-INOVATERS
-REBELS
-COWBOYS
We would have a range between; B (Middle management/ administration/ professional), C1 (Supervisory /clerical/ junior management), C2 (Skilled manual) and D (Semi and unskilled manual).


Music Video Treatment
Overall Themes:
The two main themes for this music video are isolation and coldness. The lyrics of the song revolve around the two themes. We got our initial ideas from these specific lyrics; 'and it hurts all the time', 'It's so cold in this house', 'for richer for poorer'. We then came up with three elements to fit into our music video that all relates to the song and are linked together through the main themes that are isolation, heartbreak, loneliness, coldness and the contrast in class.
The Performance Element:
The band performance is set at night, amongst the mist. This ties the performance element in with the main underlining themes because of the isolation and intense coldness. They are playing worn instruments as this adds to and fits in with the bands star image.
Narrative Elements 1:
The first of the two is about the lead singer’s journey around his cold empty house. This relates back to the lyrics above. The house is so cold that it is snowing inside and the snow increases in thickness as his journey continues. Amongst other actions, the last one will feature a dinning room with a grand dinning table in the middle of the room; he climbs on top and places himself lying down in the middle of the table face up throwing the plate to the ground, this linking with the drum exploding at the end of the track.
Narrative Elements 2:
The second of the two narrative elements is the journey of the female actor. She is the ‘other half’ of the relationship split. She walks around a council estate removing items of clothing as she goes. The council estate shows the contrast of life styles and how money doesn't count for anything, as the singer is isolated and cold but seems to be living in a much better ‘life style situation’ then the girl. The girl is taking off her clothes to represent that she no longer lives in that cold environment. She is walking back into a busy warm community and becomes more optimistic and warmer than him.
The two main themes for this music video are isolation and coldness. The lyrics of the song revolve around the two themes. We got our initial ideas from these specific lyrics; 'and it hurts all the time', 'It's so cold in this house', 'for richer for poorer'. We then came up with three elements to fit into our music video that all relates to the song and are linked together through the main themes that are isolation, heartbreak, loneliness, coldness and the contrast in class.
The Performance Element:
The band performance is set at night, amongst the mist. This ties the performance element in with the main underlining themes because of the isolation and intense coldness. They are playing worn instruments as this adds to and fits in with the bands star image.
Narrative Elements 1:
The first of the two is about the lead singer’s journey around his cold empty house. This relates back to the lyrics above. The house is so cold that it is snowing inside and the snow increases in thickness as his journey continues. Amongst other actions, the last one will feature a dinning room with a grand dinning table in the middle of the room; he climbs on top and places himself lying down in the middle of the table face up throwing the plate to the ground, this linking with the drum exploding at the end of the track.
Narrative Elements 2:
The second of the two narrative elements is the journey of the female actor. She is the ‘other half’ of the relationship split. She walks around a council estate removing items of clothing as she goes. The council estate shows the contrast of life styles and how money doesn't count for anything, as the singer is isolated and cold but seems to be living in a much better ‘life style situation’ then the girl. The girl is taking off her clothes to represent that she no longer lives in that cold environment. She is walking back into a busy warm community and becomes more optimistic and warmer than him.
Wednesday, September 16, 2009
Research Into Real Artists Of A Similar Type
When we were coming up with original ideas for our videos we looked at several different websites, images and videos of bands with similar star images and genre in the hope that it would inspire our work. We did find inspiration for style, costume, location and performance ideas, of which I will disscuss in my next blog entry. Listed bellow are some examples of where and what we looked at:
• Images


• Websites
www.blocparty.com
http://en.wikipedia.org/wiki/Bloc_Party
http://en.wikipedia.org/wiki/Indie_rock
http://en.wikipedia.org/wiki/Arctic_monkeys
• Music videos
• Images


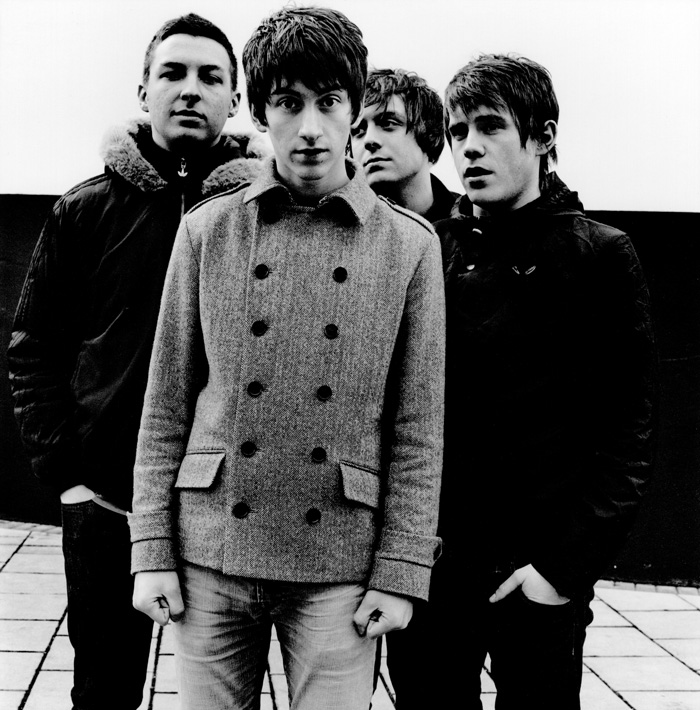
• Websites
www.blocparty.com
http://en.wikipedia.org/wiki/Bloc_Party
http://en.wikipedia.org/wiki/Indie_rock
http://en.wikipedia.org/wiki/Arctic_monkeys
• Music videos
Proposal For A New Popular Music Artist
• Band Name - ‘White Noise’
• Ganre - Alternative/Indie
• Band Format - 5 Members, All male
• Lead Vox
• Lead Gtr.
• Bass
• Keys
• Drums
• Star image - The band is asthetically pleasing, the girls are all in love with the 'Star' that is the lead singer. With the band's ideolic image, they are very public about the fact that they promote the wrok of, and involves themselves in the charity/organisation of 'Love Music, Hate Racisum'. They have a generic style of apperance, dress, behaviour and performance characteristics of an all male indie band. With a what you see is what you get attitude.
• Target Audience - 16 – 24 male/female Indie kids
• Chosen Track - Bloc Party – ‘Like Eating Glass’
• Ganre - Alternative/Indie
• Band Format - 5 Members, All male
• Lead Vox
• Lead Gtr.
• Bass
• Keys
• Drums
• Star image - The band is asthetically pleasing, the girls are all in love with the 'Star' that is the lead singer. With the band's ideolic image, they are very public about the fact that they promote the wrok of, and involves themselves in the charity/organisation of 'Love Music, Hate Racisum'. They have a generic style of apperance, dress, behaviour and performance characteristics of an all male indie band. With a what you see is what you get attitude.
• Target Audience - 16 – 24 male/female Indie kids
• Chosen Track - Bloc Party – ‘Like Eating Glass’
Friday, September 11, 2009
Advanced Portfolio Initial Ideas
EXAMPLE 1
Name Of Band and Track:
The Killers – “Human”
What Is The Star Image Of The Band?:
The killers have a very aesthetically pleasing star image, their front man; ‘The Star’ of the band is a good looking ‘pin up’ type guy.
They have a very generic ‘Glam/stadium Rock’ image which is backed up by their glamorous costumes, make up and HUGE stage shows that are just as important to the success of the band as the music is.
The ‘product’ that is The Killers has a clear brand identity that is of Large Visual Spectacle.
Treatment For Music Video:
Performance Clips:
• Band lying down performing being filmed from a high angle above
• Location: on the grass. Signifying the openness and free space from being outside.
Theme/Art Clips:
• Montage of pre filmed footage/green screen – to represent the lack of denseness discussed in the lyrics of the song and to mirror the horizontal position of the band on the ground:
Free falling through the air with coloured smoke
The Red Arrows
Space man drifting away into space during the chorus = reflecting lyrics.
EXAMPLE 2
Name Of Band and Track:
Lily Allen – “Not Fair”
What Is The Star Image Of The Band?:
Lily Allen is very generic of the typical girly pop artist. Her image of a cockney (her mockney accent), with her “F**k It” attitude, and newly aesthetic skinny appearance has helped her become the pop icon and paparazzi loved celebrity that she now is. This due to the star image that she was given by her record company.
The ‘product’ that is Lily Allen has a clear brand identity of a fun loving, pretty girl, working class rebelling pop star.
Treatment For Music Video:
Performance Clips:
• The woman playing lead singer (Lily) would be shot walking down the street in the east end of London, this reinforcing her star image of a working class girl. She would be dressed in something really flattering however procreative. She would be drinking an alcoholic beverage to add the rebellion to her look.
Narrative Clips:
• The narrative would be a double time sequence retelling the narrative of the lyrics. In the style of an old Charlie Chaplin or Laurel and Hardy video. This would give a humorous feeling to the video.
• For added comic effect the actions would be performed in a very ‘over the top’ way with repetition of occurring themes i.e. during the chorus ect.
EXAMPLE 3
Name Of Band and Track:
The Prodigy – “Omen”
What Is The Star Image Of The Band?:
The prodigy play up to the generic image of a Heavy Metal/Drum n Bass band, however, similarly to The Killers, their costumes, make up and stage shows are just as important to them and their fans as the music itself.
They do not have an aesthetically pleasing image; however it is a very unique style to them which is very useful to set them apart from other artists. They use large impressive and impacting sets and visual displays to wow you.
The ‘product’ that is The Prodigy has a clear brand identity that is fierce rock stars that are borderline crazy!
Treatment For Music Video:
Performance Clips:
• Band performing in dark studio
• Lots of lasers and lights
• Close up shots with singer leaning right into shot and singing/screaming into the camera
• Costumes, make up and set reinforcing the star image.
Theme/Art Clips:
• Voyeuristic
• Jerky shots
• Fish eye
• Footage of a surreal circus type experience (this giving it an eerie and sinister feeling) being cross cut between the performance footage
o I.e.:
o Clowns doing their acts
o Crowd laughing
o Circus type games:
Save the man
Throwing brains
Peep show
Haunted House
Name Of Band and Track:
The Killers – “Human”
What Is The Star Image Of The Band?:
The killers have a very aesthetically pleasing star image, their front man; ‘The Star’ of the band is a good looking ‘pin up’ type guy.
They have a very generic ‘Glam/stadium Rock’ image which is backed up by their glamorous costumes, make up and HUGE stage shows that are just as important to the success of the band as the music is.
The ‘product’ that is The Killers has a clear brand identity that is of Large Visual Spectacle.
Treatment For Music Video:
Performance Clips:
• Band lying down performing being filmed from a high angle above
• Location: on the grass. Signifying the openness and free space from being outside.
Theme/Art Clips:
• Montage of pre filmed footage/green screen – to represent the lack of denseness discussed in the lyrics of the song and to mirror the horizontal position of the band on the ground:
Free falling through the air with coloured smoke
The Red Arrows
Space man drifting away into space during the chorus = reflecting lyrics.
EXAMPLE 2
Name Of Band and Track:
Lily Allen – “Not Fair”
What Is The Star Image Of The Band?:
Lily Allen is very generic of the typical girly pop artist. Her image of a cockney (her mockney accent), with her “F**k It” attitude, and newly aesthetic skinny appearance has helped her become the pop icon and paparazzi loved celebrity that she now is. This due to the star image that she was given by her record company.
The ‘product’ that is Lily Allen has a clear brand identity of a fun loving, pretty girl, working class rebelling pop star.
Treatment For Music Video:
Performance Clips:
• The woman playing lead singer (Lily) would be shot walking down the street in the east end of London, this reinforcing her star image of a working class girl. She would be dressed in something really flattering however procreative. She would be drinking an alcoholic beverage to add the rebellion to her look.
Narrative Clips:
• The narrative would be a double time sequence retelling the narrative of the lyrics. In the style of an old Charlie Chaplin or Laurel and Hardy video. This would give a humorous feeling to the video.
• For added comic effect the actions would be performed in a very ‘over the top’ way with repetition of occurring themes i.e. during the chorus ect.
EXAMPLE 3
Name Of Band and Track:
The Prodigy – “Omen”
What Is The Star Image Of The Band?:
The prodigy play up to the generic image of a Heavy Metal/Drum n Bass band, however, similarly to The Killers, their costumes, make up and stage shows are just as important to them and their fans as the music itself.
They do not have an aesthetically pleasing image; however it is a very unique style to them which is very useful to set them apart from other artists. They use large impressive and impacting sets and visual displays to wow you.
The ‘product’ that is The Prodigy has a clear brand identity that is fierce rock stars that are borderline crazy!
Treatment For Music Video:
Performance Clips:
• Band performing in dark studio
• Lots of lasers and lights
• Close up shots with singer leaning right into shot and singing/screaming into the camera
• Costumes, make up and set reinforcing the star image.
Theme/Art Clips:
• Voyeuristic
• Jerky shots
• Fish eye
• Footage of a surreal circus type experience (this giving it an eerie and sinister feeling) being cross cut between the performance footage
o I.e.:
o Clowns doing their acts
o Crowd laughing
o Circus type games:
Save the man
Throwing brains
Peep show
Haunted House
Thursday, March 12, 2009
Formally Address The Seven Key Questions Specified By The Exam Board
In concluding my Blog, I am now going to answer these questions:
1. In what way does your media product use, develop or challenge forms and conventions of real media products?
Our media product uses the content in the style and structure of the overall look to generate generically authentic and spontaneous tension and rising fear in the viewer’s minds and hearts. We were aiming to play on the audiences most basic worries and let them enjoy the suffering of the characters but at the same time feel sympathetic for the mother and child. You have to focus on just the title sequence in isolation, as we are not producing rest of the scene. For more on this specific topic, refer back to the post on the evaluation called ‘Final Evaluation And Analysis Of Finnished Product’.
2. How does your media product represent particular social groups?
We represented three main social groups, being young mothers and women, who are negatively stereotyped as ineffective, weak, oblivious, complacent and helpless. For example when she is obliviously watching TV whilst the intruder is taking her child. Also we represented, again the negative stereotype of aggressive, strong, logical and predatory males. For example when the intruder cleverly makes his way into the house through the window without being heard. Lastly, we represented the middle class through the use of mise en scene, with the typical stereotype of as large houses and big gardens. For more on how we tried to represent social groups through the choice of costume and props refer back to the previous post called 'Account Of Props And Costume'.
3. What type of media institution might distribute your media product and why?
This comes down to whether it is the distribution of the product that we made ourselves or if it is a big budget remake of it. This is because with a big budget available, our idea could be a big Hollywood success as it plays on the same themes and voyeuristic style as the very successful thriller movie ‘Halloween’ (2007) used. Although the product that we made was with a very small budget and would only be suitable for television.
4. Who would be the audience for your media product?
When looking at the types of audiences that are out there that you could target your product at, you should think about the complex unwavering narratives of the sequence, variety and intensity of suspense, age, gender, adult/teen audiences or mainstream TV dram audiences. Dependant on the group you target the product at, will dictate weather it will be a massive box office success or only have a small cult following. For you to achieve your desired success you must target the right audience. For me; we would want to target the main stereotypical male teenage to young adult thriller genre follower who would want to see the film in the cinema, buy the DVD and become pulled in by all the traditional and viral marketing techniques used. This meaning that through this type of person we would be able to generate the most amount of money.
5. How did you attract/address your audience?
We attracted our audience through the production style, by targeting expectations of a thriller audience. We made it accessible as a mainstream text, which delivers a fairly predictable abduction based thriller suspense inducing narrative that gratified expectations and needs of the viewer. For more on this, refer back to Blog 'Account Of Lesson On ‘What Is A Thriller?’' when we learnt about what makes a thriller successful.
6. What have you learnt about technologies from the process of constructing this product?
The amount of new skills we have learnt is so vast. We have gained so much experience from working with different video cameras, using proper film lights to create the best light for the situation and the different editing software’s. Working with the cameras has taught us how to use and change the settings so as to be able to let the right amount of light into the camera, using different exposures, changing the white balance so the camera reads the colours correctly for the current lighting conditions and focusing correctly so that you make sure everything in your frame is sharp focus. From the beginning of the year when we edited and filmed our preliminary task to now, we have progressed in the ease of use of all the technologies available to us and it has now become a second nature to us. We have learnt about all the very complex stages of post production a film goes through and have applied them to our project. From continuity editing using Final Cut Pro, choosing and mixing the music, diegetic sounds (recorded during principle photography) and non diegetic sound effects from the effects library, building titles and finally coloring and grading. Refer back to the blogs called 'Intro To Using Final Cut Pro Editing Package', 'Intro To Video Camera', 'Account Of The Editing Process and Difficulties Encountered' to read more about the skills we learnt through making our thrillers.
7. Looking back at your preliminary task, what do you feel you have learnt in the progression from it to the full product?
The development from our preliminary task to our main thriller is humungous. Our understanding of filmic techniques in pre-production planning, on camera and set during principle photography and editing it together in a coherent and generically authentic way during post-production has significantly improved. During our preliminary task we didn’t worry about dressing the set, giving costumes to the actors, etc. so therefore we progressed in our film making skills and used much more detail and professional filming styles and skills. We created a massive production file that had planned through in huge detail every step of the principle photography stage. We were using more equipment, lighting it properly, used two microphones, one direction boom microphone and one on camera. We used audio tracks in editing to enhance the tension and spent much longer during the editing process in generating a product that’s style is authentic of a thriller movie. Refer back to previous blogs called 'Account Of Editing Our Preliminary Task' and 'Account Of Shooting Our Preliminary Task' in comparison to the how much more we took into account and executed during pre production, principle photography and post production stages of our thriller sequences, shown in past blog posts called 'Review of Shoot Day' and 'Account Of The Editing Process and Difficulties Encountered'.
Audience Feedback Based On Youtube Viewings
Link to video: Click Here
We uploaded our video to Youtube in the hope of getting audience feedback in the form of comments to give constructive criticism. I have now copied some of the comments into this blog post and am now going to reflect on them and talk about the points made.
Comment 1)
Good use of sound and music creating atmosphere and tension. The credit on the stairs is very good and works well. I like when the light is turned off and the music stops then starts again. Creates a lot of tension.
Reflection and Analysis 1)
We took a long time deciding over the sounds so that it would create tension, however we decided to use sinister innocent creepy music at the beginning whilst the child is going to bed as we wanted it to sound like a child’s toy as we thought it would help the audience to feel uneasy as to what might happen next. For example the film ‘The Orphanage’ uses childlike music throughout the film to increase tension as the juxtaposition between the scary situations with calming innocent music works well to unnerve the audience.
Comment 2)
Very effective mise en scene. Like the credits on the stairs. Very good - disturbing music, creating a scary atmosphere! Bit long, but I really enjoyed it! Well done x
Reflection and Analysis 2)
We did find it very hard to keep the length of the thriller down to as short as possible as we had shot 2 hours worth of footage and our first edit was about 5minuites long. It was a very painful process having to cut much of the footage that we really liked out of the sequence to get it down to 2:21.
Comment 3)
I think that the thriller is really effective. I think it is really realistic and believable. The only things I did not like so much were the font of the title at the end and also I was unsure of whether the lady was the mum or a baby sitter. However it was engaging and I would carry on watching the film. I thought the continuity and editing was very good as well.
Reflection and Analysis 3)
This comment is very useful as the writer obviously enjoyed the video as they would want to carry on watching the film however their comments about the choice of font for the title at the end of the sequence is interesting as our group spent a long time going through many different fonts trying to find one that looked both scary and suitable for the concept of the film.
Comment 4)
This has made me paranoid about being in my own house! Excellent casting, intruder very believable, convincing mise-en-scene, but I felt that it was maybe a bit too long. Well done anyway.
Reflection and Analysis 4)
This person mentioned our success in achieving a genuine and authentic Mise-en-scene of the film which we worked hard to try and achieve. We had to spent a long time and been very pinicaty over trying to find a location that was suitable for our needs and would give off the right vibe to the audience.
Comment 5)
I really liked the way it felt as if someone was being watched. The last credit also I thought was really good and the transitions between the shots worked very well.
Refection and Analysis 5)
I am very pleased by this comment as this is what we were hoping to achieve, the voyeuristic style and filmic technique that we saw in the movie of influence (Halloween).
1. In what way does your media product use, develop or challenge forms and conventions of real media products?
Our media product uses the content in the style and structure of the overall look to generate generically authentic and spontaneous tension and rising fear in the viewer’s minds and hearts. We were aiming to play on the audiences most basic worries and let them enjoy the suffering of the characters but at the same time feel sympathetic for the mother and child. You have to focus on just the title sequence in isolation, as we are not producing rest of the scene. For more on this specific topic, refer back to the post on the evaluation called ‘Final Evaluation And Analysis Of Finnished Product’.
2. How does your media product represent particular social groups?
We represented three main social groups, being young mothers and women, who are negatively stereotyped as ineffective, weak, oblivious, complacent and helpless. For example when she is obliviously watching TV whilst the intruder is taking her child. Also we represented, again the negative stereotype of aggressive, strong, logical and predatory males. For example when the intruder cleverly makes his way into the house through the window without being heard. Lastly, we represented the middle class through the use of mise en scene, with the typical stereotype of as large houses and big gardens. For more on how we tried to represent social groups through the choice of costume and props refer back to the previous post called 'Account Of Props And Costume'.
3. What type of media institution might distribute your media product and why?
This comes down to whether it is the distribution of the product that we made ourselves or if it is a big budget remake of it. This is because with a big budget available, our idea could be a big Hollywood success as it plays on the same themes and voyeuristic style as the very successful thriller movie ‘Halloween’ (2007) used. Although the product that we made was with a very small budget and would only be suitable for television.
4. Who would be the audience for your media product?
When looking at the types of audiences that are out there that you could target your product at, you should think about the complex unwavering narratives of the sequence, variety and intensity of suspense, age, gender, adult/teen audiences or mainstream TV dram audiences. Dependant on the group you target the product at, will dictate weather it will be a massive box office success or only have a small cult following. For you to achieve your desired success you must target the right audience. For me; we would want to target the main stereotypical male teenage to young adult thriller genre follower who would want to see the film in the cinema, buy the DVD and become pulled in by all the traditional and viral marketing techniques used. This meaning that through this type of person we would be able to generate the most amount of money.
5. How did you attract/address your audience?
We attracted our audience through the production style, by targeting expectations of a thriller audience. We made it accessible as a mainstream text, which delivers a fairly predictable abduction based thriller suspense inducing narrative that gratified expectations and needs of the viewer. For more on this, refer back to Blog 'Account Of Lesson On ‘What Is A Thriller?’' when we learnt about what makes a thriller successful.
6. What have you learnt about technologies from the process of constructing this product?
The amount of new skills we have learnt is so vast. We have gained so much experience from working with different video cameras, using proper film lights to create the best light for the situation and the different editing software’s. Working with the cameras has taught us how to use and change the settings so as to be able to let the right amount of light into the camera, using different exposures, changing the white balance so the camera reads the colours correctly for the current lighting conditions and focusing correctly so that you make sure everything in your frame is sharp focus. From the beginning of the year when we edited and filmed our preliminary task to now, we have progressed in the ease of use of all the technologies available to us and it has now become a second nature to us. We have learnt about all the very complex stages of post production a film goes through and have applied them to our project. From continuity editing using Final Cut Pro, choosing and mixing the music, diegetic sounds (recorded during principle photography) and non diegetic sound effects from the effects library, building titles and finally coloring and grading. Refer back to the blogs called 'Intro To Using Final Cut Pro Editing Package', 'Intro To Video Camera', 'Account Of The Editing Process and Difficulties Encountered' to read more about the skills we learnt through making our thrillers.
7. Looking back at your preliminary task, what do you feel you have learnt in the progression from it to the full product?
The development from our preliminary task to our main thriller is humungous. Our understanding of filmic techniques in pre-production planning, on camera and set during principle photography and editing it together in a coherent and generically authentic way during post-production has significantly improved. During our preliminary task we didn’t worry about dressing the set, giving costumes to the actors, etc. so therefore we progressed in our film making skills and used much more detail and professional filming styles and skills. We created a massive production file that had planned through in huge detail every step of the principle photography stage. We were using more equipment, lighting it properly, used two microphones, one direction boom microphone and one on camera. We used audio tracks in editing to enhance the tension and spent much longer during the editing process in generating a product that’s style is authentic of a thriller movie. Refer back to previous blogs called 'Account Of Editing Our Preliminary Task' and 'Account Of Shooting Our Preliminary Task' in comparison to the how much more we took into account and executed during pre production, principle photography and post production stages of our thriller sequences, shown in past blog posts called 'Review of Shoot Day' and 'Account Of The Editing Process and Difficulties Encountered'.
Audience Feedback Based On Youtube Viewings
Link to video: Click Here
We uploaded our video to Youtube in the hope of getting audience feedback in the form of comments to give constructive criticism. I have now copied some of the comments into this blog post and am now going to reflect on them and talk about the points made.
Comment 1)
Good use of sound and music creating atmosphere and tension. The credit on the stairs is very good and works well. I like when the light is turned off and the music stops then starts again. Creates a lot of tension.
Reflection and Analysis 1)
We took a long time deciding over the sounds so that it would create tension, however we decided to use sinister innocent creepy music at the beginning whilst the child is going to bed as we wanted it to sound like a child’s toy as we thought it would help the audience to feel uneasy as to what might happen next. For example the film ‘The Orphanage’ uses childlike music throughout the film to increase tension as the juxtaposition between the scary situations with calming innocent music works well to unnerve the audience.
Comment 2)
Very effective mise en scene. Like the credits on the stairs. Very good - disturbing music, creating a scary atmosphere! Bit long, but I really enjoyed it! Well done x
Reflection and Analysis 2)
We did find it very hard to keep the length of the thriller down to as short as possible as we had shot 2 hours worth of footage and our first edit was about 5minuites long. It was a very painful process having to cut much of the footage that we really liked out of the sequence to get it down to 2:21.
Comment 3)
I think that the thriller is really effective. I think it is really realistic and believable. The only things I did not like so much were the font of the title at the end and also I was unsure of whether the lady was the mum or a baby sitter. However it was engaging and I would carry on watching the film. I thought the continuity and editing was very good as well.
Reflection and Analysis 3)
This comment is very useful as the writer obviously enjoyed the video as they would want to carry on watching the film however their comments about the choice of font for the title at the end of the sequence is interesting as our group spent a long time going through many different fonts trying to find one that looked both scary and suitable for the concept of the film.
Comment 4)
This has made me paranoid about being in my own house! Excellent casting, intruder very believable, convincing mise-en-scene, but I felt that it was maybe a bit too long. Well done anyway.
Reflection and Analysis 4)
This person mentioned our success in achieving a genuine and authentic Mise-en-scene of the film which we worked hard to try and achieve. We had to spent a long time and been very pinicaty over trying to find a location that was suitable for our needs and would give off the right vibe to the audience.
Comment 5)
I really liked the way it felt as if someone was being watched. The last credit also I thought was really good and the transitions between the shots worked very well.
Refection and Analysis 5)
I am very pleased by this comment as this is what we were hoping to achieve, the voyeuristic style and filmic technique that we saw in the movie of influence (Halloween).
Final Evaluation And Analysis Of Finnished Product
We were required to research, plan, shoot and edit the opening of a thriller film sequence, for us to succeed in making our thriller sequence a sensation, the final product had to be generically authentic and generate significant rising tension and atmosphere.
In our initial lessons on thrillers we were taught the basic aspects that can either make a thriller scary or not and create fear and suspense in the hearts and minds of the audience. We learnt that by playing with our most basic worries and drawing on the most infantile and therefore subdued thoughts (these thoughts can be voyeuristic, sexual or violent) you can provide significant tension and have the viewer in the palm of your hand to manipulate them in however way you want. We used this point in the development of our initial idea. We decided to focus the sequence around a child being taken by an intruder, using the child to represent the helplessness and the love of any mother and the intruder as someone no one wants to ever find in their house. If you raise these questions in the minds of the audience they will feel unnerved and become removed from their usual safety comfort zones.
Having learnt all this we tried achieve and apply as much as we could to the production of our thriller. Firstly, the production style of our thriller had to be thought through and planned very carefully so as to ensure that we provide sufficient tension and fear; this was prepared during the pre-production stage when we produced a production file containing all the details and planning for principle photography. Things that we took into account that had to be looking authentic to enhance the realism for the viewers to sufficiently believe what was happening and to take into account what will get them scared. All this comes under the heading of Mise-en-scene; this means everything that you see in the frame, the firstly topic is costume. Costume played a major role; the costume had to be looking genuine, as they are vital for generating realism. A very important one is the setting and location. We had huge difficulty finding a suitable location that would create fear and alarm in the audience. We were looking for a fairly big quite oldish house that was secluded so that the audience would feel vulnerable with no one to help. We saw an example of this in ‘Don’t Look Now’ (Nick Roeg, 1973) when there house was isolated and there was no one to help them when their daughter died. We did find one that was sufficient for what we needed and not much set dressing had to take place, it was good as it gave off the old creepy look very well just from the look of it. The lighting played a very important part in creating tension. We had to generate a very dark, unwelcoming and sinister look so the lighting was key in the success of this. The casting had to be real and stereotypical, due to the fact that the sequence had to be so short we had to get across as quickly as we could the meaning and interpretation of each character so the casting had to represent the most typical person you would connect to the role.
Then in the principle photography stage, we had to generate the tension from the shots that we chose to capture. This came from the composition and setup of each shot, for example, if you were wanting to produce a scene that illustrated vulnerability and helplessness, we would shoot a high angled shot, this creating the desired feelings through the shots themselves. We used some of these high angled shots of the mother throughout our sequence, as we wanted to create a helpless vulnerable view of her. We also constructed some shots that used different angles to create a sense of enigma and disorientation for example the shot of the intruder walking up the stairs. A typical way to make the viewer feel uncomfortable and uneasy is to do a right to left pan, this happens because its unnatural to us as English because we are used to reading from left to tight. Some other techniques we decided to exercise were to have very distinct hand held shots and POV shots of the intruder; this enhances the voyeuristic style. As soon as people feel like someone is watching them secretly we become very paranoid, so this works well to create tension. We used this style for most shots of the intruder.
Lastly, creating anxiety in the post-production stage was the hardest as you can totally change the meaning of something through the style of editing and the type of shots you place next to each other. The meaning becomes contextualised by it’s positioning in its relation to either key filmic elements, which helps to anchor down its meaning significance and potential interpretation. During editing, another technique we used was the scene of delay to create discomfort for the viewer. In our thriller sequence cross cutting and cut aways were used to show the second storyline of the intruder entering the house, slowly introducing him ready for the climax in the middle of the sequence. The quick speed of these cuts makes you question what and who it is and therefore increases tension. A factor that also helped with this is providing the audience with privilege audience knowledge (the bomb under the table technique) and showing them through the quick cross cutting the intruder entering, meanwhile the mother and child are totally unaware of anything being wrong, so this makes the atmosphere during the build up to the climax very tense.
I feel that the main weaknesses in our product is down to the narrative being to drawn out and not enough focus being placed on the ambience and more focus needed to be turned to the isolation of the child and the oblivious vulnerability of the mother, due to this we did not put in enough little snapshots and quick cross cuts. My other main regret is that we lit the shots to brightly so the finished product isn't dark enough to give it the sinister feeling it needs. On a much smaller scale there are a few shots where you can very briefly see the corner of the red head lights/lighting stands, but it is very hard to notice so it is not a major issue.
On a more pleasant note, the main strengths are that it is generic in what it looks like and achieves, with full realism throughout. We fulfilled the unit brief, therefore the sequence is an overall a success, reaching out to the audience and providing them with an entertaining piece of film. A major strength of ours that was a massive contributer to our success was our organisation as a group during each of the stages of the project, making it much easier to accomplish. I am also pleased with the success of the technicalities we had learnt in class before hand and were able to put to practice during the making of our project.
In our initial lessons on thrillers we were taught the basic aspects that can either make a thriller scary or not and create fear and suspense in the hearts and minds of the audience. We learnt that by playing with our most basic worries and drawing on the most infantile and therefore subdued thoughts (these thoughts can be voyeuristic, sexual or violent) you can provide significant tension and have the viewer in the palm of your hand to manipulate them in however way you want. We used this point in the development of our initial idea. We decided to focus the sequence around a child being taken by an intruder, using the child to represent the helplessness and the love of any mother and the intruder as someone no one wants to ever find in their house. If you raise these questions in the minds of the audience they will feel unnerved and become removed from their usual safety comfort zones.
Having learnt all this we tried achieve and apply as much as we could to the production of our thriller. Firstly, the production style of our thriller had to be thought through and planned very carefully so as to ensure that we provide sufficient tension and fear; this was prepared during the pre-production stage when we produced a production file containing all the details and planning for principle photography. Things that we took into account that had to be looking authentic to enhance the realism for the viewers to sufficiently believe what was happening and to take into account what will get them scared. All this comes under the heading of Mise-en-scene; this means everything that you see in the frame, the firstly topic is costume. Costume played a major role; the costume had to be looking genuine, as they are vital for generating realism. A very important one is the setting and location. We had huge difficulty finding a suitable location that would create fear and alarm in the audience. We were looking for a fairly big quite oldish house that was secluded so that the audience would feel vulnerable with no one to help. We saw an example of this in ‘Don’t Look Now’ (Nick Roeg, 1973) when there house was isolated and there was no one to help them when their daughter died. We did find one that was sufficient for what we needed and not much set dressing had to take place, it was good as it gave off the old creepy look very well just from the look of it. The lighting played a very important part in creating tension. We had to generate a very dark, unwelcoming and sinister look so the lighting was key in the success of this. The casting had to be real and stereotypical, due to the fact that the sequence had to be so short we had to get across as quickly as we could the meaning and interpretation of each character so the casting had to represent the most typical person you would connect to the role.
Then in the principle photography stage, we had to generate the tension from the shots that we chose to capture. This came from the composition and setup of each shot, for example, if you were wanting to produce a scene that illustrated vulnerability and helplessness, we would shoot a high angled shot, this creating the desired feelings through the shots themselves. We used some of these high angled shots of the mother throughout our sequence, as we wanted to create a helpless vulnerable view of her. We also constructed some shots that used different angles to create a sense of enigma and disorientation for example the shot of the intruder walking up the stairs. A typical way to make the viewer feel uncomfortable and uneasy is to do a right to left pan, this happens because its unnatural to us as English because we are used to reading from left to tight. Some other techniques we decided to exercise were to have very distinct hand held shots and POV shots of the intruder; this enhances the voyeuristic style. As soon as people feel like someone is watching them secretly we become very paranoid, so this works well to create tension. We used this style for most shots of the intruder.
Lastly, creating anxiety in the post-production stage was the hardest as you can totally change the meaning of something through the style of editing and the type of shots you place next to each other. The meaning becomes contextualised by it’s positioning in its relation to either key filmic elements, which helps to anchor down its meaning significance and potential interpretation. During editing, another technique we used was the scene of delay to create discomfort for the viewer. In our thriller sequence cross cutting and cut aways were used to show the second storyline of the intruder entering the house, slowly introducing him ready for the climax in the middle of the sequence. The quick speed of these cuts makes you question what and who it is and therefore increases tension. A factor that also helped with this is providing the audience with privilege audience knowledge (the bomb under the table technique) and showing them through the quick cross cutting the intruder entering, meanwhile the mother and child are totally unaware of anything being wrong, so this makes the atmosphere during the build up to the climax very tense.
I feel that the main weaknesses in our product is down to the narrative being to drawn out and not enough focus being placed on the ambience and more focus needed to be turned to the isolation of the child and the oblivious vulnerability of the mother, due to this we did not put in enough little snapshots and quick cross cuts. My other main regret is that we lit the shots to brightly so the finished product isn't dark enough to give it the sinister feeling it needs. On a much smaller scale there are a few shots where you can very briefly see the corner of the red head lights/lighting stands, but it is very hard to notice so it is not a major issue.
On a more pleasant note, the main strengths are that it is generic in what it looks like and achieves, with full realism throughout. We fulfilled the unit brief, therefore the sequence is an overall a success, reaching out to the audience and providing them with an entertaining piece of film. A major strength of ours that was a massive contributer to our success was our organisation as a group during each of the stages of the project, making it much easier to accomplish. I am also pleased with the success of the technicalities we had learnt in class before hand and were able to put to practice during the making of our project.
Account Of The Editing Process and Difficulties Encountered
We had a very stressful beginning to our editing process. Due to a technical malfunction, our time code was broken in several places. This made it very difficult to digitise the whole tape all in one go. So to digitise our footage, we had to isolate each break in the time code and digitise each section individually. This was very frustrating as it took a long time to complete, and set us back time wise by about a week.
Once we had digitised all our footage, we went about turning the rushes from one long continues video file into individual shots from the storyboards, this process is called logging. We decided to split all the shots up into 4 main categories of the four different locations, bedroom, living room, stairways and outside, and put them in separate ‘bins’. For the shots that we taken many takes of we also had to select the best take for the sequence, this was often very hard to chose. To make it easier when selecting the material for the timeline we named each shot with the type of shot and timing, e.g. Medium shot, Over Shoulder, 5 Secs.
When we had logged each shot of our 1 hour and 10 minutes of footage, we went about bringing a selection of clips from the log bins down onto the timeline. We stuck to the basic structure of the storyboards but had to vary it when we wanted to include some of the extra shots we shot on the day of principle photography. Our first sequence that we put together included far too much footage and lasted 6 minutes, having done some basic continuity editing, and this lasted too long so we had to start making some hard decisions of deciding what material we would get rid of.
Something that helped in this step is having different shots on different lines of the timeline so that we could delete and move around shots freely, this was extra helpful when it came to laying down the sound. Firstly, we went through a large database of un-copyrighted music and sound effects. We were specifically looking for music that sounded innocently scary to tie in with the theme of the innocent child being stolen. Most of the music was very short clips, so to make the music last longer we had to copy and paste the clips and cut bits out so that it sounded like it all flowed together. We also had to mix the audio with the ambient sounds that we recorded during principle photography.
The penultimate stage of editing was to put the titles onto the sequence. We had a slight problem with this as there weren’t many shots long enough for some of the credits as we have quite a lot of fast cross cutting going on, which reflects the production style mirroring content. We had to make sure that all the credits were consistent and the same size and font so that they all looked coherent.
The final stage was the phase that makes the product look professional and properly polished. You have to watch it through very carefully making minute changes to the colour, lighting, final sound and visual cut and the overall grading of the sequence. This makes the whole thing run together in a seamless and smooth style that shows the well-finished postproduction stage of our sequence. The grading stage adds a filter over the top of the footage that gives it the impressive filmic look and enhances the style and typical aesthetics of Hollywood high production values. All this finishes the product off with a properly professional look.
Once we had digitised all our footage, we went about turning the rushes from one long continues video file into individual shots from the storyboards, this process is called logging. We decided to split all the shots up into 4 main categories of the four different locations, bedroom, living room, stairways and outside, and put them in separate ‘bins’. For the shots that we taken many takes of we also had to select the best take for the sequence, this was often very hard to chose. To make it easier when selecting the material for the timeline we named each shot with the type of shot and timing, e.g. Medium shot, Over Shoulder, 5 Secs.
When we had logged each shot of our 1 hour and 10 minutes of footage, we went about bringing a selection of clips from the log bins down onto the timeline. We stuck to the basic structure of the storyboards but had to vary it when we wanted to include some of the extra shots we shot on the day of principle photography. Our first sequence that we put together included far too much footage and lasted 6 minutes, having done some basic continuity editing, and this lasted too long so we had to start making some hard decisions of deciding what material we would get rid of.
Something that helped in this step is having different shots on different lines of the timeline so that we could delete and move around shots freely, this was extra helpful when it came to laying down the sound. Firstly, we went through a large database of un-copyrighted music and sound effects. We were specifically looking for music that sounded innocently scary to tie in with the theme of the innocent child being stolen. Most of the music was very short clips, so to make the music last longer we had to copy and paste the clips and cut bits out so that it sounded like it all flowed together. We also had to mix the audio with the ambient sounds that we recorded during principle photography.
The penultimate stage of editing was to put the titles onto the sequence. We had a slight problem with this as there weren’t many shots long enough for some of the credits as we have quite a lot of fast cross cutting going on, which reflects the production style mirroring content. We had to make sure that all the credits were consistent and the same size and font so that they all looked coherent.
The final stage was the phase that makes the product look professional and properly polished. You have to watch it through very carefully making minute changes to the colour, lighting, final sound and visual cut and the overall grading of the sequence. This makes the whole thing run together in a seamless and smooth style that shows the well-finished postproduction stage of our sequence. The grading stage adds a filter over the top of the footage that gives it the impressive filmic look and enhances the style and typical aesthetics of Hollywood high production values. All this finishes the product off with a properly professional look.
Wednesday, January 28, 2009
Review of Shoot Day

The main goals we were trying to achieve were primarily producing a thriller sequence that was both generically authentic and that showed proof that our production practises had developed from when we made the preliminary task. All this proving that we had a good technical understanding of the key areas in production and filming.
Throughout the whole day we didn’t have any major issues with casting, location or props. This was very useful as if we had come across difficulties with any of this we would have been pushed for time. The only slight scare we had was one of the cast members turned up a little late and we hadn’t been able to get hold of him. This made us slightly late setting off but we soon made up the time when we arrived at location as our planning and organisation helped us to get back onto schedule. The little child we had cast also caused a tiny problem at the beginning as she got very scared by all the camera crew and equipment so become tearful, this was soon resolved.
We had allocated plenty of time to film each shot and we had given ourselves a lot more time for setting up each shot than we actually needed, this gave us the chance to shoot much more footage and we gained some quite exciting shots that weren’t on the storyboard. The only problem was trying to get all the dark shots done in the little time allocated for them, we managed this very successfully and I was pleased as we got a very nice shot at the end just before we left of a circling shot around the mother as she looks up at the window.
The equipment that we took with us was 2 Sony PDR170 mini DV cameras; including their camera microphones that were plugged into channel 1. To set up the cameras we made sure that the tapes were fast forwarded 30 seconds in so that we were sure to not get any interference. We made sure that the white balance was set to sunlight as the camera gets the best result when shooting with redheads if the white balance is set to outside, (even when shooting inside!). We had to make sure that the gain was on 0dB as we didn’t want any unwanted noise on the image. We also had two fluid head Vinton tripods; these had to be bubbled after every time they get moved or the height is changed. We used 2 red head video lights to let the set and we gelled them up with blue gels as the camera sees it as tungsten light, the combination of this and the outside white balance works best with the camera. For the sound, we used a Senhiser directional microphone placed onto a boom pole using a suspension unit; this was then covered with a rycote softie to get rid of the unwanted wind noise. This has to be used like a gun and has to be pointed at the object making the noise or the noise source. This was plugged into channel 2 on the camera so that in the editing process you can select which channel you want to use, enhance or delete.
We had prepared enough time on our shooting schedule (shown Below this paragraph) for dressing the set as we had a large team with us and not too much to do. The rooms were perfect for what we wanted to achieve so we didn’t do much to it. The only things we did were move furniture slightly to make the moving of equipment and people easier. We had measured the windows of each room so we knew how many bin bags we would need, and blacking the windows didn’t take much time at all. With all the windows blacked the external light of the day didn’t cause us any problems apart from trying to hide the bin bags from the camera so had to make sure the curtains were kept closed closed or making sure that the windows weren't in shot. Throughout the day we became better and better and much faster at the setting up of the equipment and by lunchtime it was like second nature and we could move the camera and lights from shot to shot in a matter of seconds.

We stuck to our jobs that we had chosen at the beginning of the process as director, producer, director of photographer and the chief editor. The director took the role of called the shots and tolled the actors what to do, I as the producer made sure that everything ran smoothly, made sure that things were running to schedule and checked with the cast that everything was ok, I made sure that everything was where it was meant to be so that the day went without any hiccups. The director of photography checking the frame for any objects that shouldn’t be there and operated the camera and the chief editor was put in charge of the sound during the day of shooting. This worked well as it meant that all the jobs were done and nothing was forgotten. It also helped to speed things up as everyone knew what they were meant to be doing and it all got done.
We stuck to the storyboard fairly religiously and shot all of our shots and as we still had time, we were able to improvise and add to our storyboard with many more shots than we had drawn up. The main technical aspects that we had to watch carefully throughout the days shooting was checking the sound and making sure that it didn’t peak, making sure that there was nothing breaking realism. We had to make sure that the tripod was always bubbled and the dampers on the tripod were either tight enough or loose enough for the circumstance. Another is that we ha d to monitor that we weren’t breaking the 180 degree rule and be aware of which side of the room we were shooting from and not change it round. We also I noticed that we were shooting straight into the mirror once so that was an issue as well.
I, our group and the quality of the final product have developed so much from the shooting of our preliminary task. I have learnt so much and gain so much experience from the beginning of the course. The shooting of the thriller felt so much more professional than the shooting and production of the preliminary task. Most of this is down to the fact that we were using proper lighting, a good cast with costumes and had chosen a suitable and appropriate location and props. It is also down to the fact that we are now so much more aware of the correct ways of production and shooting. Our organisation was key to our success and we had planned in great detail each and every stage. We had got schedules, lists, and call sheets for everyone and everything involved so that we were sure to create a video that reflected the professionalism we had achieved in the production. I felt that in the shooting of it we were much more experienced than before as we understood and were able to use greater tools and skills. This has helped us to develop greatly from our preliminary task.
Throughout the whole day we didn’t have any major issues with casting, location or props. This was very useful as if we had come across difficulties with any of this we would have been pushed for time. The only slight scare we had was one of the cast members turned up a little late and we hadn’t been able to get hold of him. This made us slightly late setting off but we soon made up the time when we arrived at location as our planning and organisation helped us to get back onto schedule. The little child we had cast also caused a tiny problem at the beginning as she got very scared by all the camera crew and equipment so become tearful, this was soon resolved.
We had allocated plenty of time to film each shot and we had given ourselves a lot more time for setting up each shot than we actually needed, this gave us the chance to shoot much more footage and we gained some quite exciting shots that weren’t on the storyboard. The only problem was trying to get all the dark shots done in the little time allocated for them, we managed this very successfully and I was pleased as we got a very nice shot at the end just before we left of a circling shot around the mother as she looks up at the window.
The equipment that we took with us was 2 Sony PDR170 mini DV cameras; including their camera microphones that were plugged into channel 1. To set up the cameras we made sure that the tapes were fast forwarded 30 seconds in so that we were sure to not get any interference. We made sure that the white balance was set to sunlight as the camera gets the best result when shooting with redheads if the white balance is set to outside, (even when shooting inside!). We had to make sure that the gain was on 0dB as we didn’t want any unwanted noise on the image. We also had two fluid head Vinton tripods; these had to be bubbled after every time they get moved or the height is changed. We used 2 red head video lights to let the set and we gelled them up with blue gels as the camera sees it as tungsten light, the combination of this and the outside white balance works best with the camera. For the sound, we used a Senhiser directional microphone placed onto a boom pole using a suspension unit; this was then covered with a rycote softie to get rid of the unwanted wind noise. This has to be used like a gun and has to be pointed at the object making the noise or the noise source. This was plugged into channel 2 on the camera so that in the editing process you can select which channel you want to use, enhance or delete.
We had prepared enough time on our shooting schedule (shown Below this paragraph) for dressing the set as we had a large team with us and not too much to do. The rooms were perfect for what we wanted to achieve so we didn’t do much to it. The only things we did were move furniture slightly to make the moving of equipment and people easier. We had measured the windows of each room so we knew how many bin bags we would need, and blacking the windows didn’t take much time at all. With all the windows blacked the external light of the day didn’t cause us any problems apart from trying to hide the bin bags from the camera so had to make sure the curtains were kept closed closed or making sure that the windows weren't in shot. Throughout the day we became better and better and much faster at the setting up of the equipment and by lunchtime it was like second nature and we could move the camera and lights from shot to shot in a matter of seconds.
We stuck to our jobs that we had chosen at the beginning of the process as director, producer, director of photographer and the chief editor. The director took the role of called the shots and tolled the actors what to do, I as the producer made sure that everything ran smoothly, made sure that things were running to schedule and checked with the cast that everything was ok, I made sure that everything was where it was meant to be so that the day went without any hiccups. The director of photography checking the frame for any objects that shouldn’t be there and operated the camera and the chief editor was put in charge of the sound during the day of shooting. This worked well as it meant that all the jobs were done and nothing was forgotten. It also helped to speed things up as everyone knew what they were meant to be doing and it all got done.
We stuck to the storyboard fairly religiously and shot all of our shots and as we still had time, we were able to improvise and add to our storyboard with many more shots than we had drawn up. The main technical aspects that we had to watch carefully throughout the days shooting was checking the sound and making sure that it didn’t peak, making sure that there was nothing breaking realism. We had to make sure that the tripod was always bubbled and the dampers on the tripod were either tight enough or loose enough for the circumstance. Another is that we ha d to monitor that we weren’t breaking the 180 degree rule and be aware of which side of the room we were shooting from and not change it round. We also I noticed that we were shooting straight into the mirror once so that was an issue as well.
I, our group and the quality of the final product have developed so much from the shooting of our preliminary task. I have learnt so much and gain so much experience from the beginning of the course. The shooting of the thriller felt so much more professional than the shooting and production of the preliminary task. Most of this is down to the fact that we were using proper lighting, a good cast with costumes and had chosen a suitable and appropriate location and props. It is also down to the fact that we are now so much more aware of the correct ways of production and shooting. Our organisation was key to our success and we had planned in great detail each and every stage. We had got schedules, lists, and call sheets for everyone and everything involved so that we were sure to create a video that reflected the professionalism we had achieved in the production. I felt that in the shooting of it we were much more experienced than before as we understood and were able to use greater tools and skills. This has helped us to develop greatly from our preliminary task.
Preparation For The Shoot Day
Prior to our shoot we all met and had a talk about finalising all our arrangements. We discussed locations and checked that we had confirmation on the house we were shooting in. We looked at the travel arrangements and got directions from the house owner and then gave the directions to any of the cast or crew driving themselves there.
We checked everything was finalised with our casting and contact each of our actors and made sure that they had received our call sheets and storyboards so that they were briefed on all that was expected from them and what they needed to do.
We discussed the props that were still outstanding to collect. Our main issue was what child’s toy we would use as the object that the mother finds outside. We were told that the actor playing the little girl owned an ITeddy; we decided that this was a suitable toy so we had to make sure that it was all charged up and ready to be used for the shoot day.
Like for props we didn’t have many issues that needed to be thought through for costume but we contacted each of the cast reminding them of what to wear or bring. We felt that it was important to put the intruder all in black as it automatically told the viewer that he was bad.
The envisaged time management for us was going to be very difficult to stick to as we had a lot of shots to shoot when it gets dark, but we had to be back at school by 6.00. We just made sure that we would all follow the shooting schedule religiously so that we didn’t get too pressured with the timing.
We then called it a day and left with our fingers crossed!
We checked everything was finalised with our casting and contact each of our actors and made sure that they had received our call sheets and storyboards so that they were briefed on all that was expected from them and what they needed to do.
We discussed the props that were still outstanding to collect. Our main issue was what child’s toy we would use as the object that the mother finds outside. We were told that the actor playing the little girl owned an ITeddy; we decided that this was a suitable toy so we had to make sure that it was all charged up and ready to be used for the shoot day.
Like for props we didn’t have many issues that needed to be thought through for costume but we contacted each of the cast reminding them of what to wear or bring. We felt that it was important to put the intruder all in black as it automatically told the viewer that he was bad.
The envisaged time management for us was going to be very difficult to stick to as we had a lot of shots to shoot when it gets dark, but we had to be back at school by 6.00. We just made sure that we would all follow the shooting schedule religiously so that we didn’t get too pressured with the timing.
We then called it a day and left with our fingers crossed!
Subscribe to:
Posts (Atom)